Table of Contents
Looking for a pain-free way to get tattooed? You have landed at the right place!
Tattoo is an art that has inspired and intrigued millions around the world. Tattoos are considered a visual form of communication. Some people get tattooed for fun while others opt for more meaningful ones to tell a visual story. No matter what the reason there is, tattoos are definitely attractive. But if you are not up for getting poked by a needle or not sure if you would be able to accept a permanent mark on your body, I have got you covered.
I will help you get a digital tattoo on your body using Photoshop. Let’s get started with the tutorial!

Do Some Online Surfing
In order to get started, you will need a tattoo image that you can look for on the internet. Just Google tattoo designs and save the ones you like. However, if you don’t want to get in any trouble, use stock images or go to Google Images and click Tools. You will see a bunch of options from which you must select Usage Right and in the dropdown menu, select Labeled for reuse with modification. Make sure you choose an image with high resolution so that it doesn’t get distorted when you modify it. It is good to make use of an image that is already masked, but if you don’t find one, you can use the Layer Blend to Multiply it.
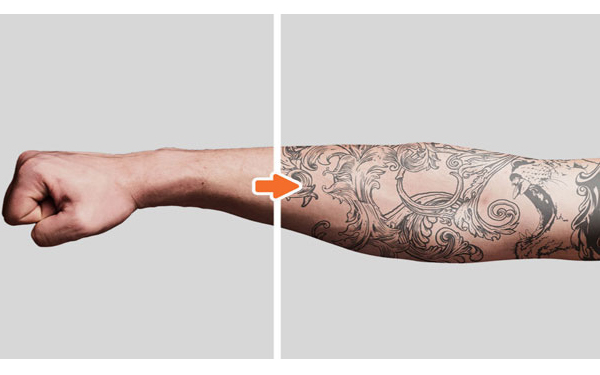
Place the Tattoo Over your Image
Open the picture you want to put the tattoo on in Photoshop and open the tattoo image in a separate window. After making necessary modifications to the tattoo image, drag and drop the image over your source image. If the body that you are placing the tattoo on is flat, a simple Multiply blending tool will work.
Getting the Effects Right
If you look at a real tattoo, you would witness lots of imperfections. When you get inked, your skin tends to get discoloured. In order to achieve this, you will need to make use of multiple filters in Photoshop.
You can do so by duplicating the layer and applying the Reticulation filter to create pattern on the skin. Place this filter under the tattoo layer with its contrast levels a bit increased. You will also need to make tweaks to the opacity based on your desired outcome.
Now copy the tattoo layer, apply the Reticulation filter and lay it over the original layer. Set the blend to Soft Light mode with its opacity set at 30%. The edges of the tattoo must be smeared out. In order to add this effect, you will need to set Gaussian Blur at 0.5 and add Outer Glow by picking a warm colour. For more on working with layers see this
Photoshop article.
You can change the colour of the tattoo by going to the Hue & Saturation option and push the Colourise button. Change the Hue and Saturation to turn the tattoo greyish black. You can go to the Curves Adjustment option to set the brightness and darkness levels.
Getting tattooed in Photoshop is easier and can be done with no amount of pain. So, what are you waiting for?

UI/UX Consultant, Photoshop, XD, SketchApp, Product Designer, Website Designer, Mobile App Designer, Expert WordPress Developer. For web/mobile design and wordpress development related projects please contact me at dibakar@themepurpose.com


